Introduction
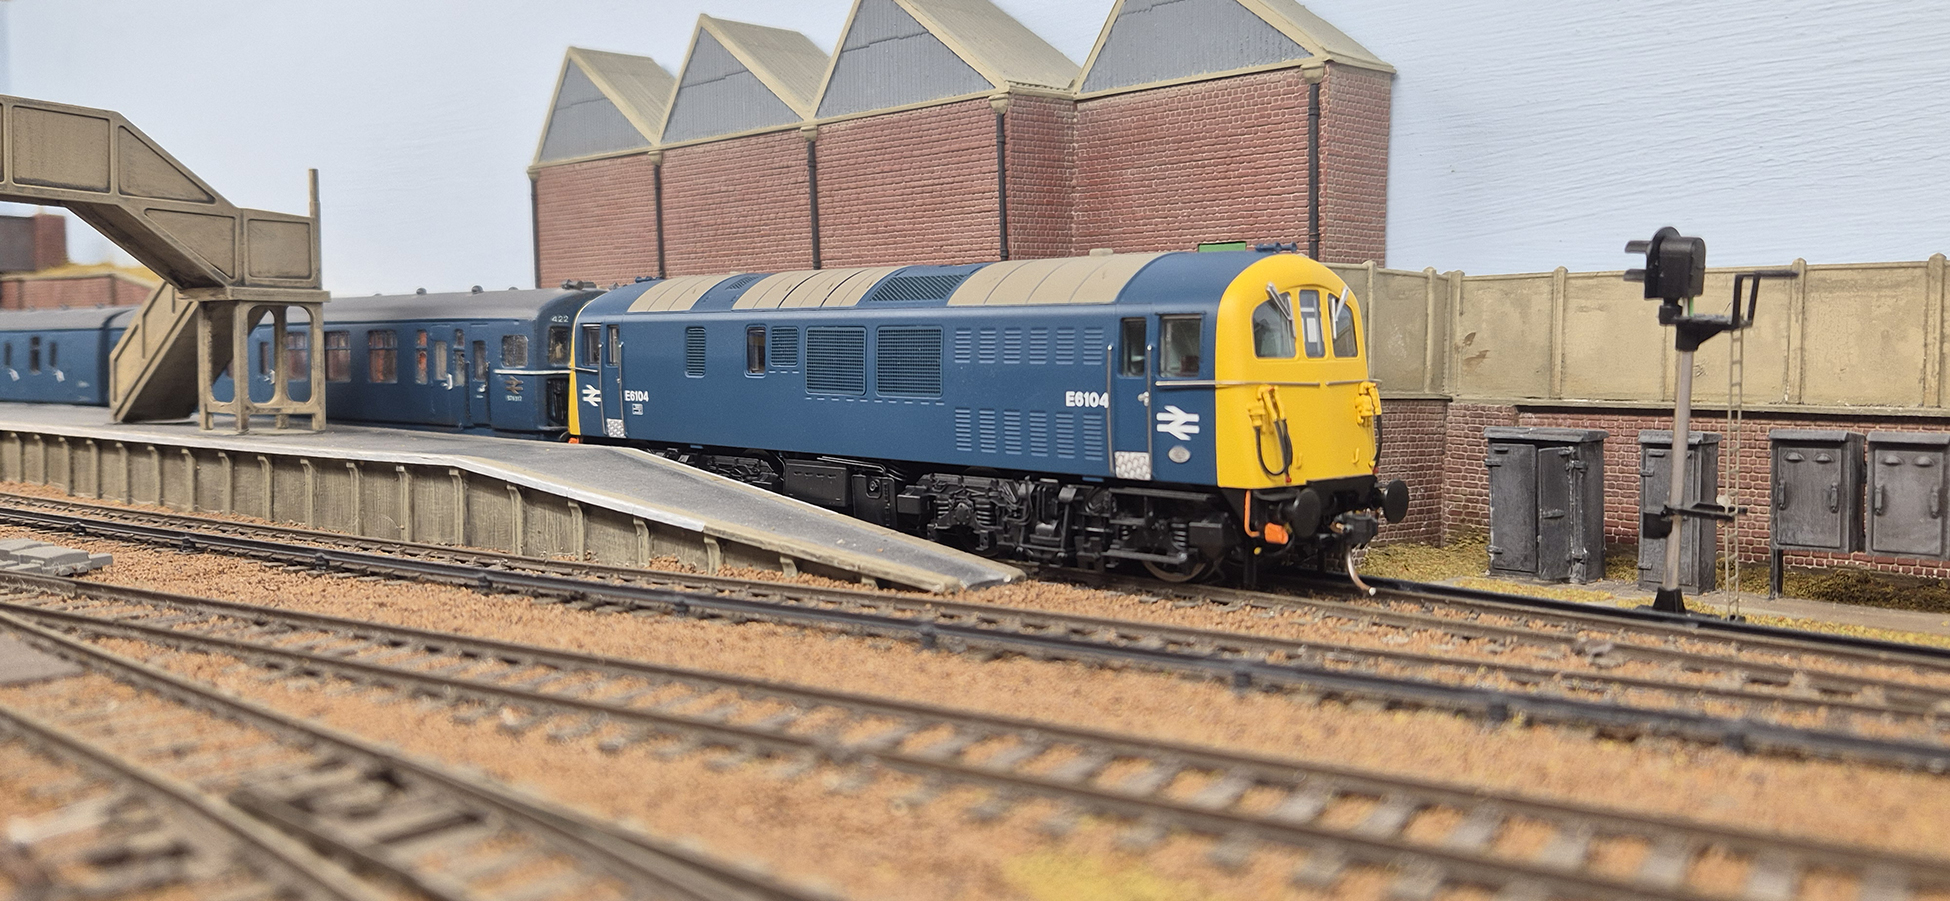
Back in the early half of 2018, I decided that a rebuild and extension of my Blackhurst layout was required so that I could fit 6-coach multiple unit trains in my station platforms. This newly rebuilt layout (renamed West Sands) would require a new station building to be constructed. Being a fan of the Southern "Art-deco" style of construction, I decided it would be of this type.
For any of you familiar with this style of design, you will immediately think of stations such as Seaton, Surbiton and Woking and their curved brickwork, large windows and concrete detail relief.
I started to doodle some rough 3D designs in pencil, taking inspiration from photos of these stations, but nothing seemed to gel fully, until one club evening, a rough design came to fruition that seemed to click. Here, I really must thank the late Kevin Fry for all his help with designing this building. Without it, I very much doubt it would look as good.
However, the next stumbling block I came up against was having any useful dimension details for these buildings. An internet search yielded very little useful information, so I was stumpt, until I was fortunate to pick up a copy of Southern Nouveau at the 2018 REC exhibition, which contained, amongst other useful information, plans for the station building at Chessington South. Whilst not of the exact same design, it gave me some useful exterior and interior dimensions to work with, and a scale drawing was made.
Construction of the building was started by making a shell out of 40 thou plain plasticard and then laminating the exterior layer on top. The following photos and captions explain the rest of the construction.
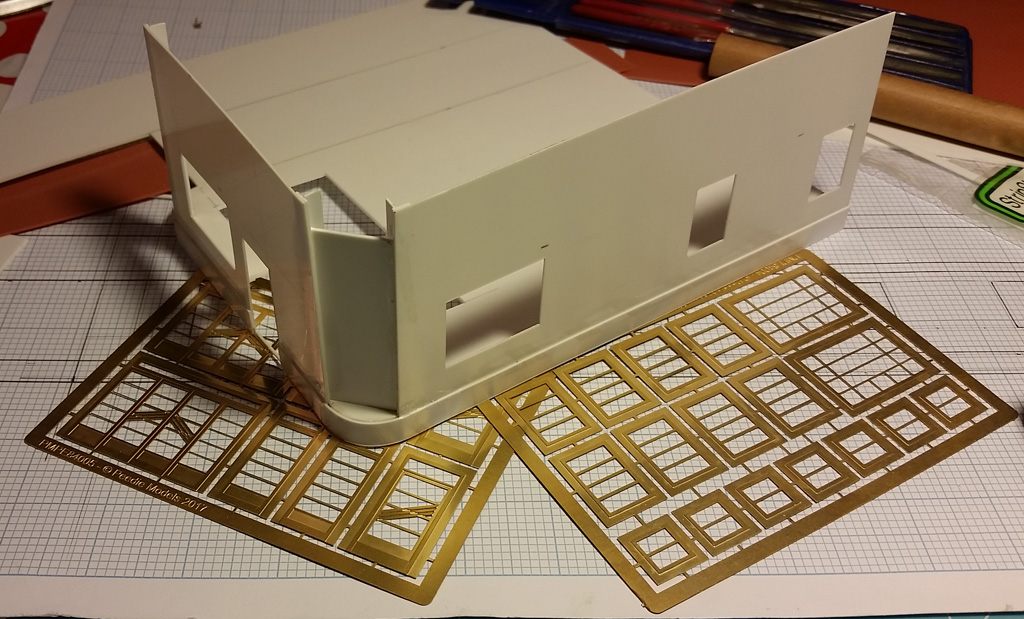
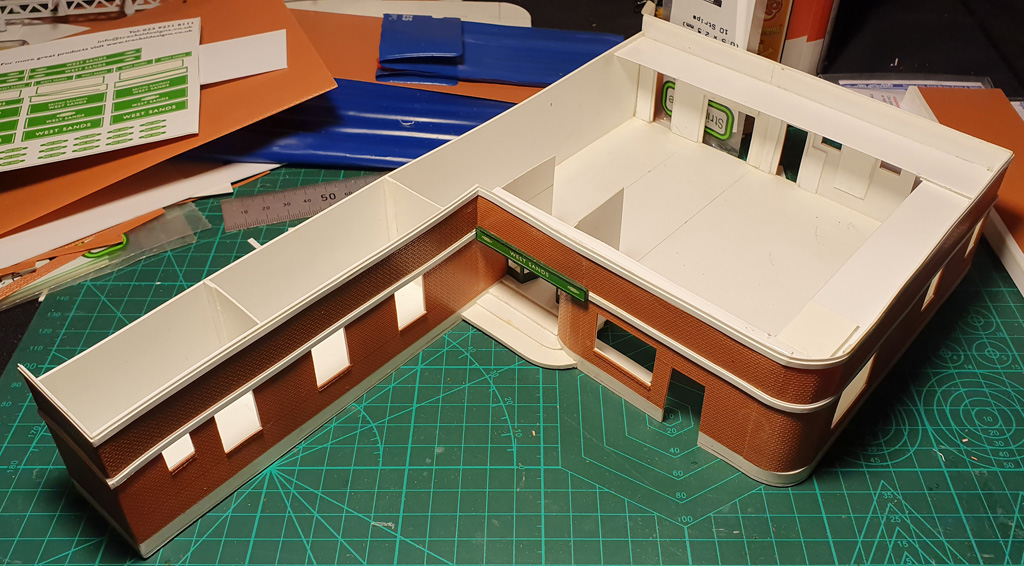
This shows the initial phase of construction with the first 2 walls attached to the floor. The windows and door apertures have been cut out. These are cut slightly larger than the etches, to give a bit of wiggle room. The actual window size will be cut into the brick layer. The gap on the corner is to allow the exterior brickwork to curve around.
Also shown are the etched brass windows and doors. These were sourced online from Peedie Models in their Southern Moderne range. They are now available from Online Models Ltd in their Model Railway Features range.
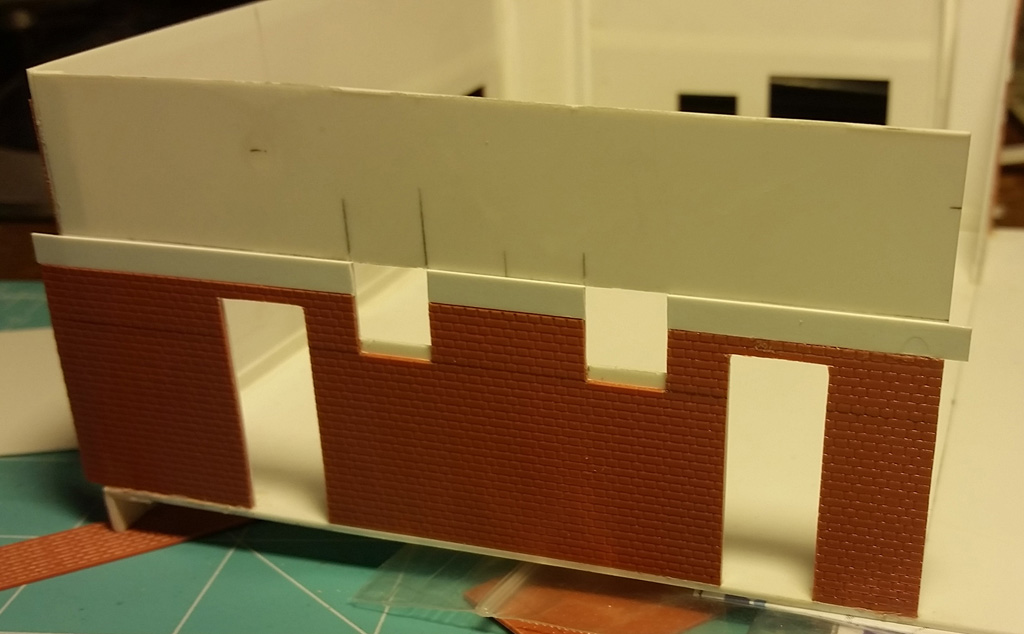
Next was to start laminating the exterior. Most of the brick-built 'art-deco' style buildings had a brick lower and upper half separated by a concrete lintel which is replicated on my building.
This picture actually shows an error I made. The small windows shown here for the toilets should not be intersecting the lintel. These have been lowered now, and the lintel now continues the full length of the side of the building. We can't have the roof collapsing on my model railway customers now, can we!
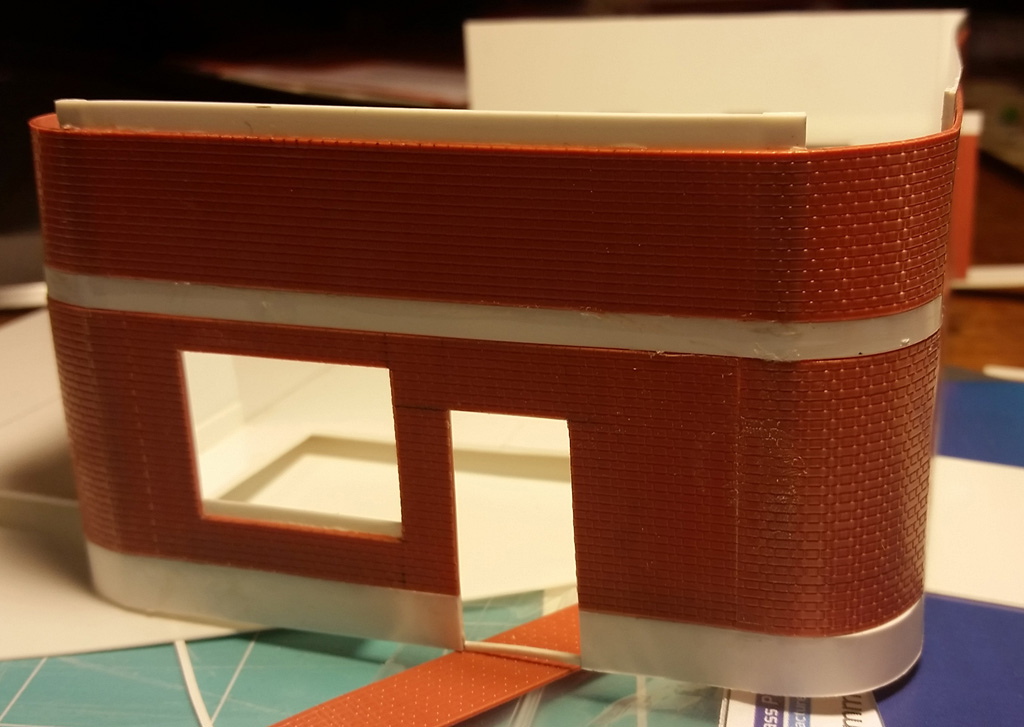
To get the brick to follow the curvature of the building, small panels were cut, which slightly overlapped the corner, and were then rolled around a piece of brass. One edge was glued first, and then the other edge glued. The rest of the walls were then added. If you look closely you can see the join on the lower section. Were I to do this again, I would probably either use a roller, or place it in some hot water, to pre-curve the entire wall piece.
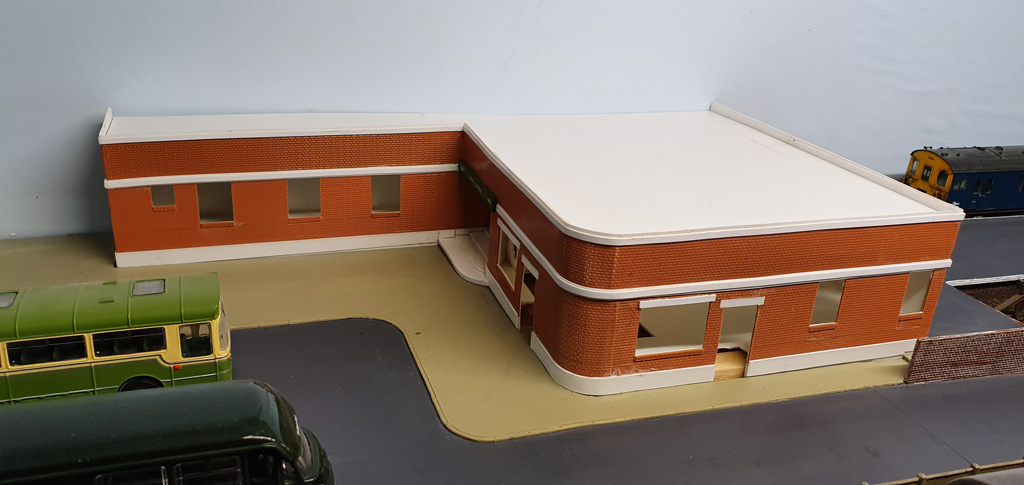
Two views of the completed building shell. The second in place on the layout with a temporary roof in place.
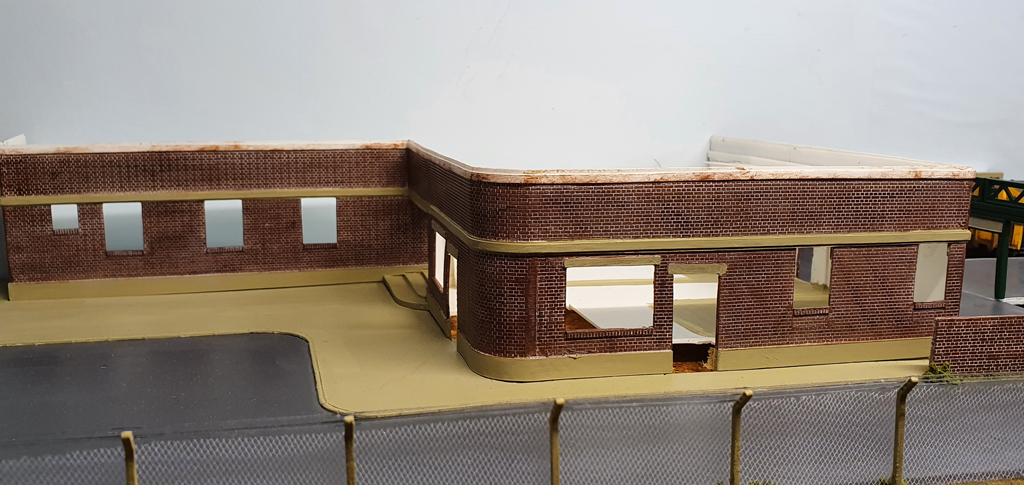
Once I had completed the shell of the building, it needed painting before adding the windows. Any part needing to be concrete were painted using Polly Scale Acrylic Aged Concrete, imported from the US, and sadly no longer in production. I’m on my last bottle unfortunately, so will need to find a suitable replacement. The brickwork was painted in a base colour of Tamiya Acrylic Red Brown 2. Once dry, to create the mortar, Vallejo ivory was painted over the brick, left for a couple of seconds, and then wiped off with a paper towel. This leaves the colour between the bricks and also helps to tone down the brick red colour. Once this was dry, I then go over the brickwork with various shades of red brown paint, dry-brushed on, to vary the brick tones.
The next job was to glue in the doors and windows. As previously mentioned, these are etched brass from Peedie Models. They were initially given a coat of grey acrylic primer (Humbrol) and then sprayed with Humbrol acrylic white for the windows and Railmatch Enamel Southern Stock Green for the doors. There was some debate between myself and Kevin whether the doors should be painted green or be varnish wood, and the Southern had examples of both. In the end, I decided to go with the green, simply because it looks more ‘Southern’.
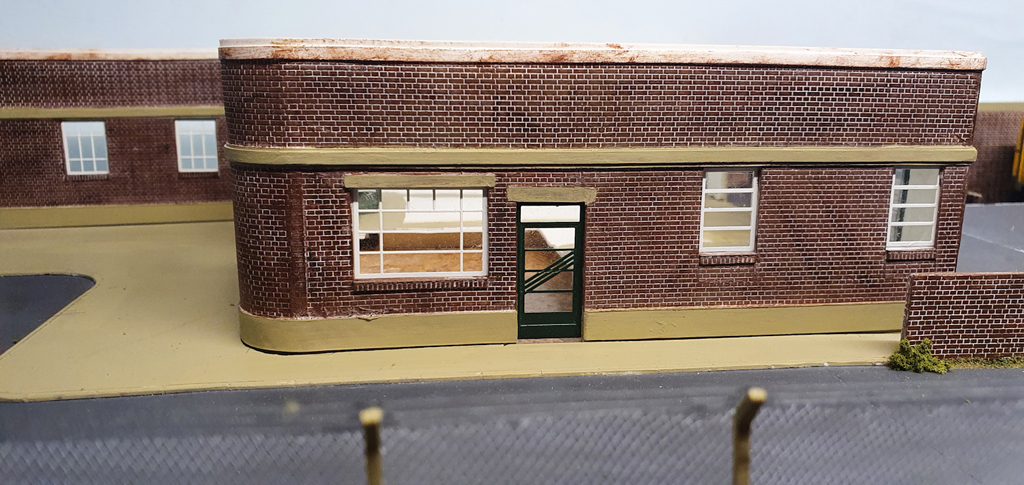
A view of the building from the front of the layout. The large window and door will belong to a taxi firm, with the window opaque with the company logo, and there should be a nice big sign above. The 2 smaller windows to the right are for the ladies waiting room, the door for which comes off the station concourse, hence they are up at platform level.
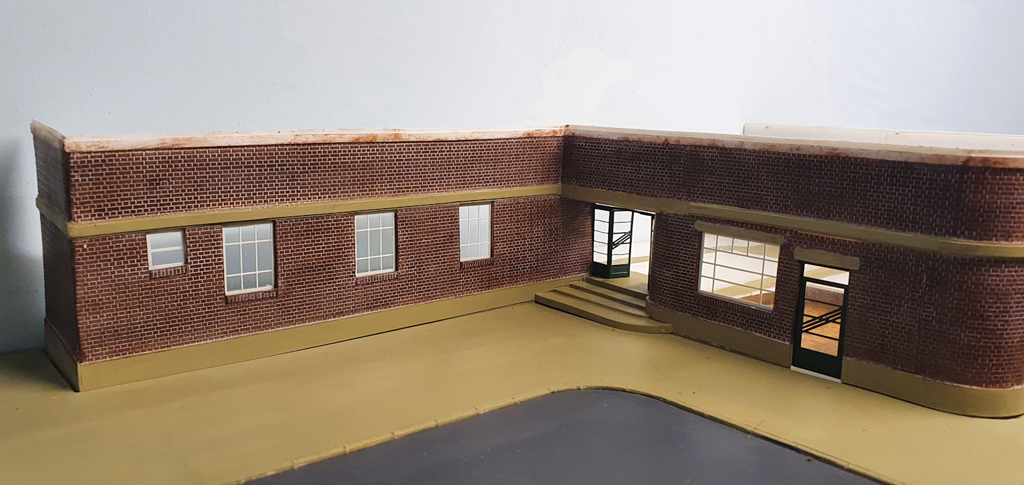
The windows have already been glazed with clear Plasticard, and are stuck on using Klear, a Johnson floor polish. For those who are curious, it is also apparently very good for varnishing models and can be sprayed neat without thinning. I managed to source a bottle on Amazon, where it now goes by the name of Johnson’s Revive It. Apparently a single bottle should last a lifetime.
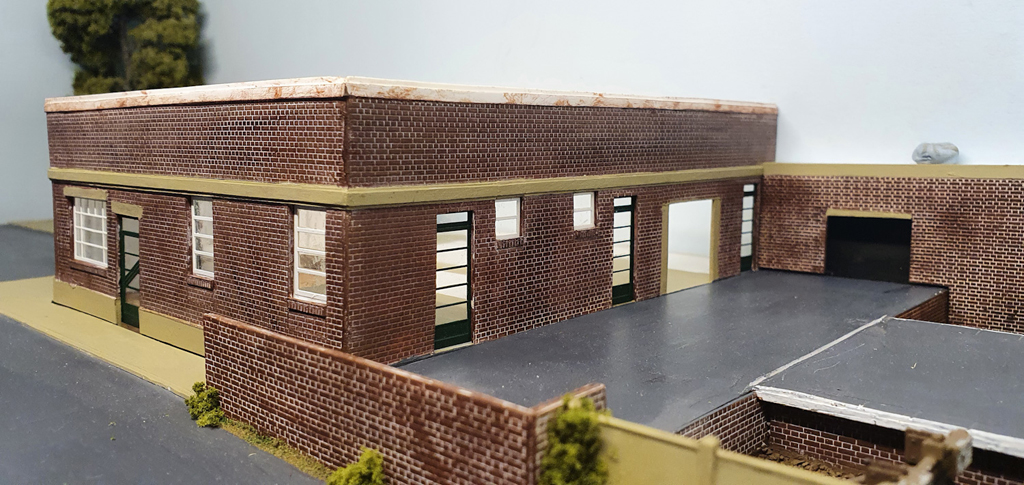
A view across the concourse. This view will be obstructed once the scene is complete with the station canopy. Also in this picture can be seen the additional building to the right (temporaily tacked in place with Blu-tack!), which houses the parcels dock. The doorway disappearing into the dark will have its doors slightly open, revealing a Post Office van being unloaded.
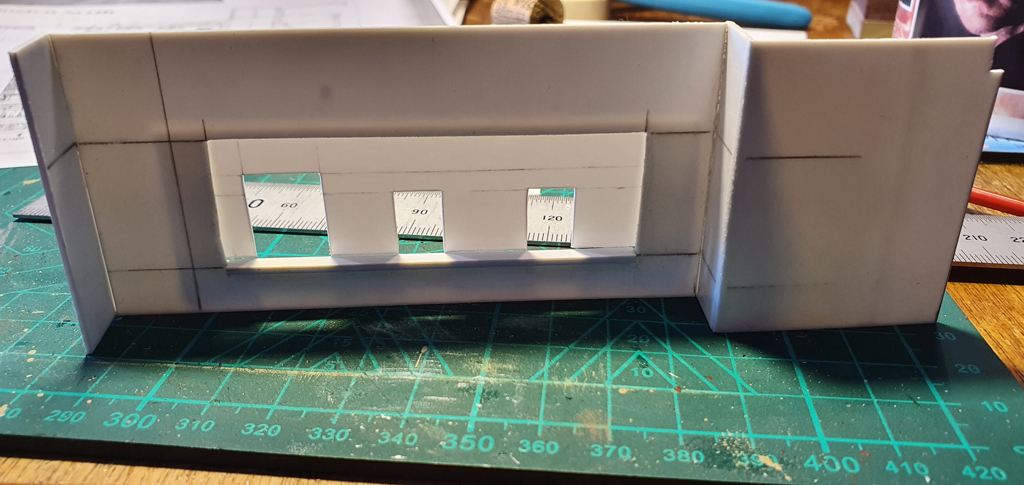
Here is the start to the station interior. I’ve tried to keep it fairly basic, as it’ll hardly be seen. The main details and dimensions are loosely based on Surbiton. We have a large opening for handling Parcels and 2 ticket windows. If I’m honest, a small seaside terminus would probably only have had just the 1 ticket window, but it seems to balance out nicely with 2.
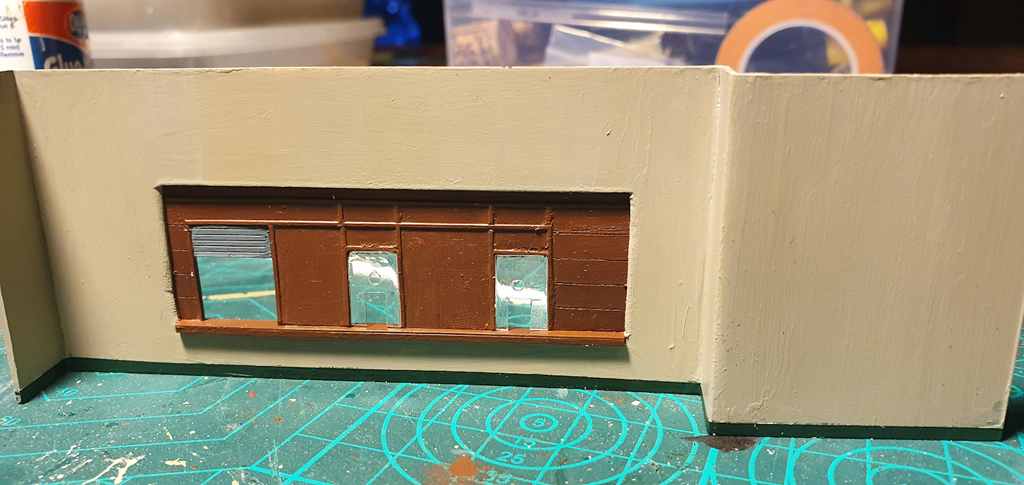
And now painted. Microstrip and scribing the plastic suggests wooden panelling, and has been painted a suitable shade, Tamiya Linoleum Brown I think. The walls are painted a cream shade, Tamiya Deck Tan, with a suggestion of skirting boards, again painted Railmatch Southern Stock green.
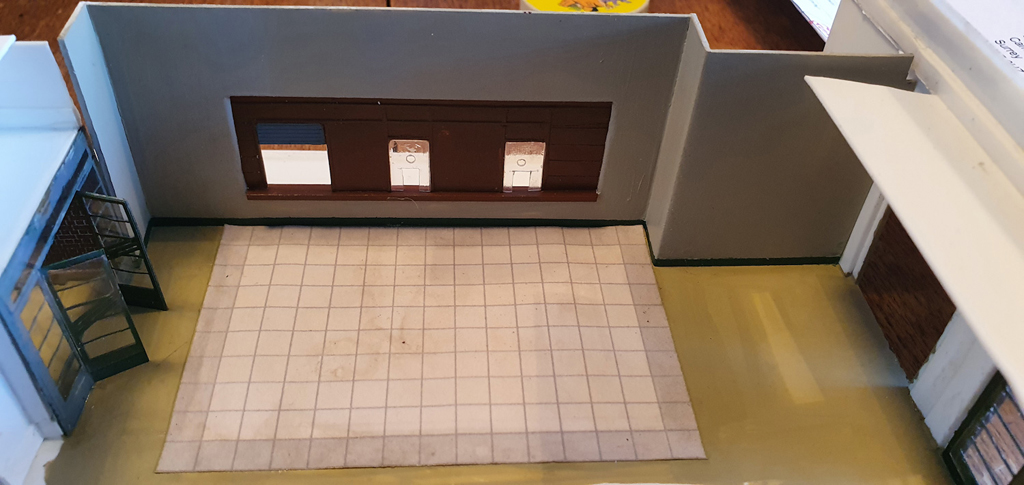
The pre-prepared wall was then glued in place, with the floor already having been painted concrete. I noticed in pictures of Surbiton station, that there was a nice marble tiled floor in the central area of the concourse.
To replicate this, I took to the internet and found an image of a standard 2 foot square marble tile. In Photoshop, I created the grid to look like the grouting, and then copied the tile image and pasted into each square. The outer tiles were then giving a slightly darker shading. This was then printed out on plain paper, cut out and glued down.
As can be seen in this photo, when I glued it down (using liquid glue), the printer ink has started to run, and some of the concrete colour has started to come through. I have subsequently taken this one up, and replaced it with a freshly printed copy, this time glued down with PVA.
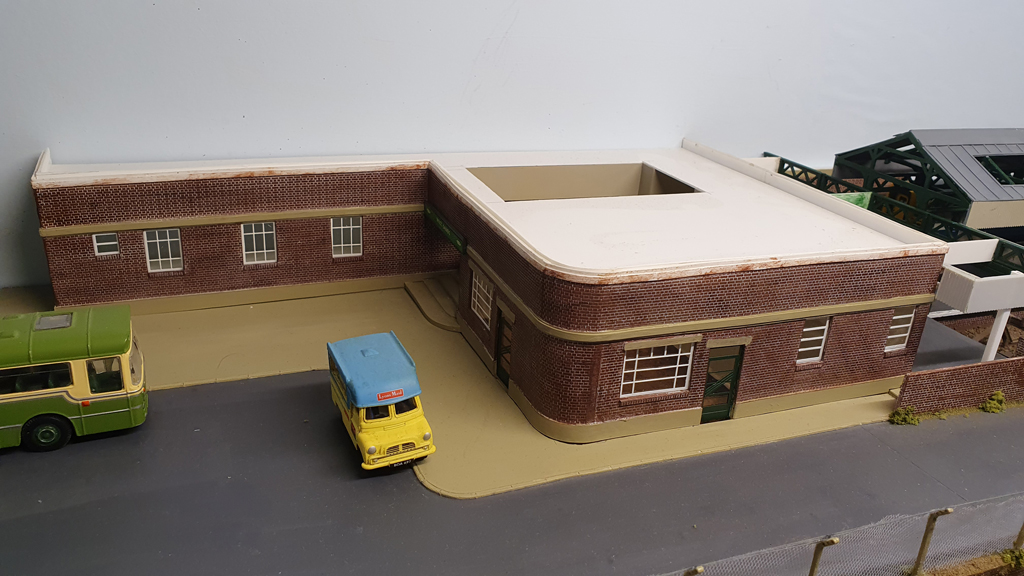
And here we come to our final picture for now, with the building back on the layout, and with the roof slowly progressing.
As mentioned earlier, I had a bit of a conundrum with regard to the roof. Now as they say in modelling (Murphy’s law no.1 I believe), if you scratchbuild something, a kit will be produced, and if you kit-build something, it will be released ready-to-run. Well, in my case it wasn’t quite that (yes, Bachmann do produce a ready to plant Art-deco station building, but I digress), however, as I mentioned, there were very few drawings available, especially of Seaton. Low and behold, along comes the June 2000 issue of Railway Modeller, and there is a two page article on Seaton station building, plus drawings. Great, I think, just as I’ve got mine almost finished. However, Kevin spotted something I hadn’t seen myself. Seaton station had a glass atrium above the booking hall. So, as you can see in the above picture, I have cut out a hole in the roof, ready for the atrium.
And that is about as far as I have got. I thought it would be a good idea to complete the station canopy, before finishing off the roof, so I could see how the heights would relate to each other. The canopy has taken me quite a while to do, almost worthy of an article or two in itself.